")
So, I was trying to snag some tickets for a game at Citizens Bank Park the other day. You know how it is, you look at those little dots on a map and try to guess if the seat’s any good. It’s always a bit of a crapshoot, right?
I remember this one time, years ago, I thought I got a steal, but then I ended up behind a pole. Not the whole game, but enough to be annoying. Didn’t want a repeat of that, especially since I was trying to make it a good outing.
My Hunt for a Better View (Before Buying)
Anyway, I figured there had to be a better way. I started poking around online, thinking, “How can I actually see what I’m getting into?” And then it hit me, or maybe I saw it mentioned somewhere – a “virtual seating chart.” For Citizens Bank Park, specifically. Sounded promising, so I decided to give it a shot.
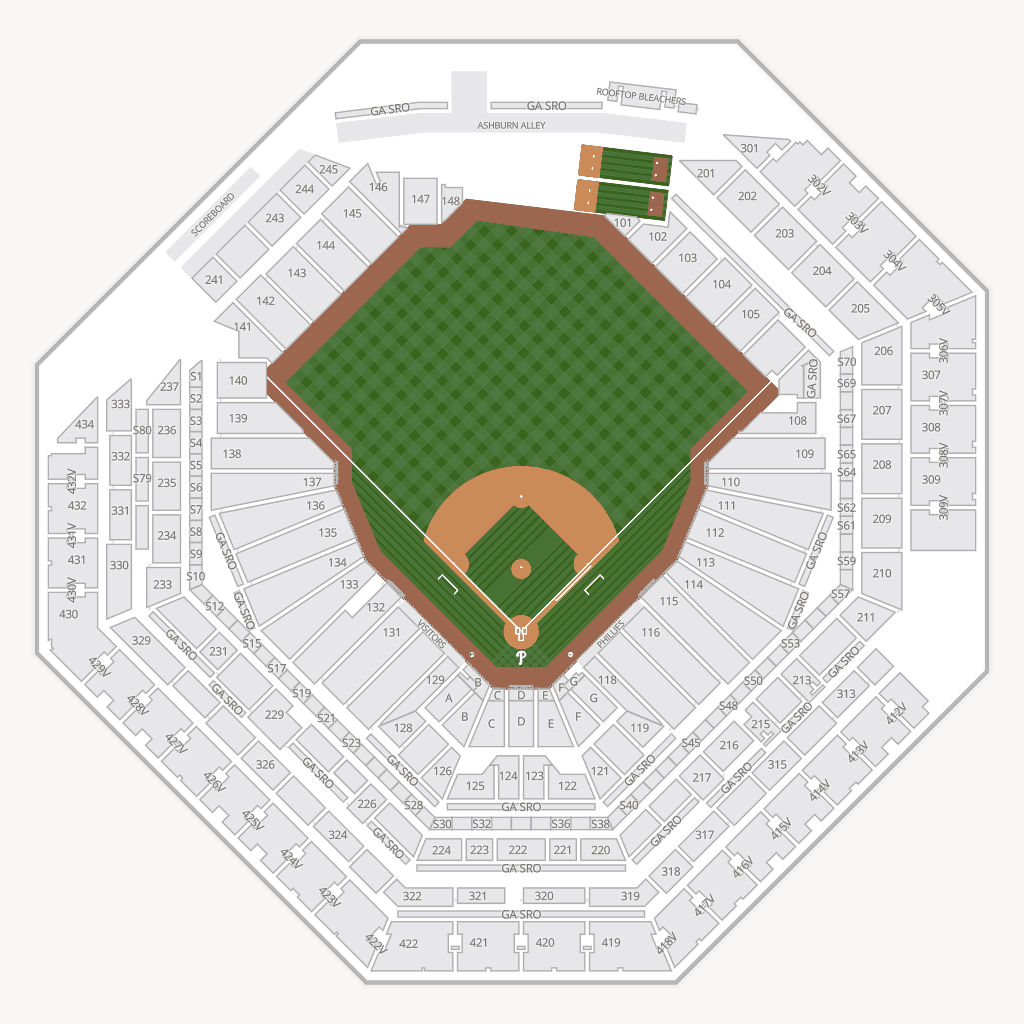
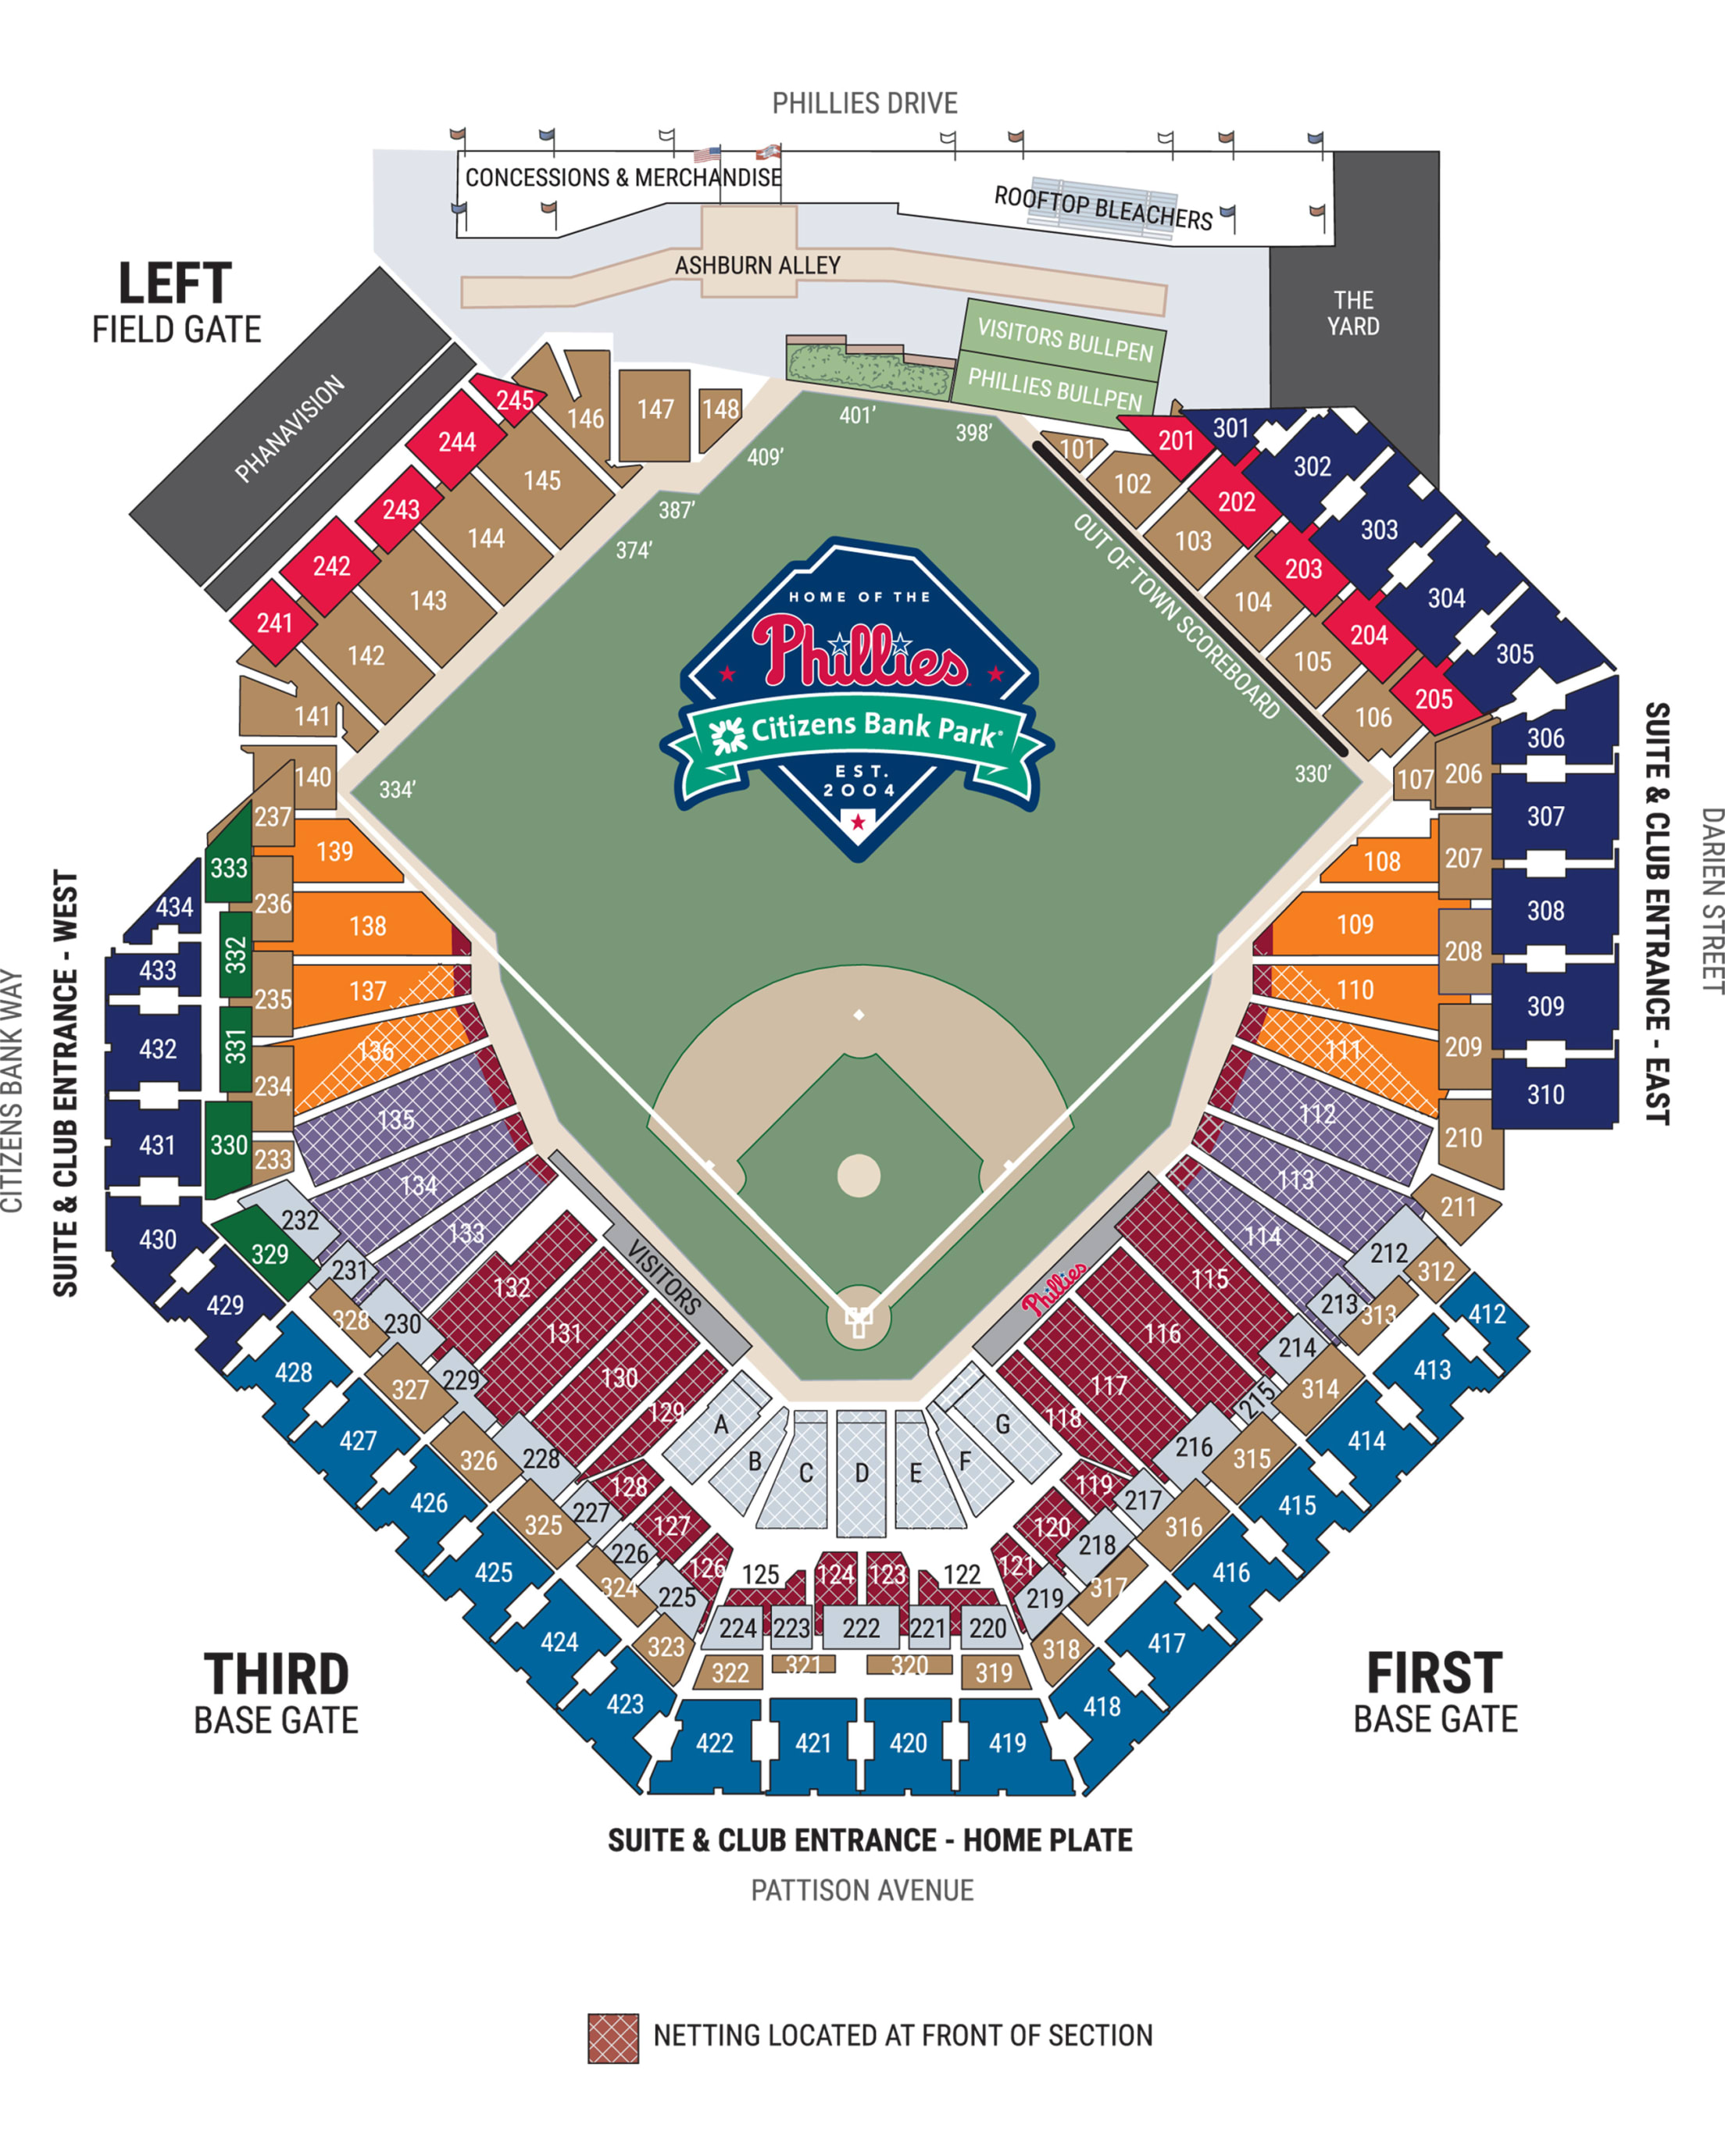
Finding one wasn’t too hard. Once I got it loaded up, the first thing I did was just take a look at the overall layout. You kind of get a bird’s-eye view, which helps to orient yourself if you haven’t been there in a while, or ever.
Getting into the Nitty-Gritty
Then the fun part started. I began clicking on different sections. I was curious, you know? What’s the view like from down near the dugout? What about up in the cheap seats? I spent a good amount of time just virtually “walking” around.
- I’d pick a section, say, Section 135.
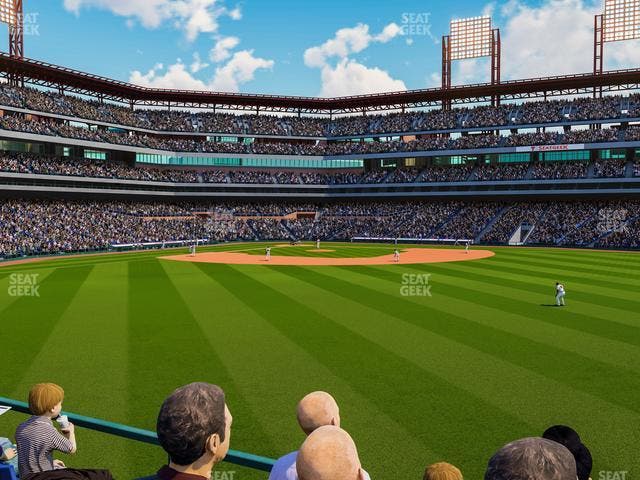
- Then the tool would try to show me a representation of the view from roughly that area.
- Some of these virtual views are pretty decent. Not like you’re actually there, obviously, but it gives you a much better idea than a flat map.
I was really focused on a few things. First, any weird obstructions. Second, how steep the angle might be. And third, just the general perspective. Would I be looking straight on, or would my neck be craned the whole game?
The Actual Search for My Seats
I had a budget in mind, so I wasn’t just looking at the super expensive seats. I started comparing what I saw on the virtual chart with the prices I was seeing on ticket sites. For example, I’d check out a section in the 200 level, see the virtual view, then see how much tickets there cost. Then I’d compare that to, say, a section in the outfield.
It was a bit of back-and-forth. I’d find a section that looked promising on the virtual tour, then check the price. Sometimes the price was too high for the view, or sometimes a cheaper section actually looked pretty decent from the virtual perspective.
One thing I found useful was checking out the areas under overhangs. Good to know if you’re trying to avoid the sun, or maybe want some cover if it looks like rain. The chart kind of showed that.
Did it help?
Yeah, I’d say so. It’s not perfect, and nothing beats actually being in the ballpark to know your favorite spot. But for someone trying to make an informed decision without physically going there first, it was a big help. I felt a lot more confident about the seats I eventually picked because I had at least a simulated idea of what I was getting.
Took me a bit, clicking around, comparing different spots. But in the end, I landed on some seats I felt good about, thanks to that virtual exploration. Way better than just guessing from a static map. Now, fingers crossed the game is a good one!