
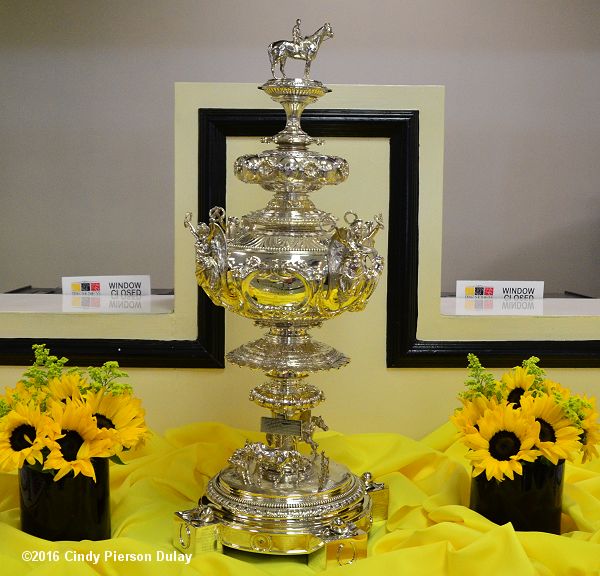
Okay, so yesterday I was messing around with some metal clay, trying to make something cool. I saw this picture of the Preakness Stakes trophy, right? That big ol’ urn thing. I thought, “Hey, that looks kinda doable. Let’s give it a shot!”
First thing I did was grab my sketchbook and started sketching out the basic shape. You know, the kinda bulbous body, the handles, the little horses on top. Didn’t worry too much about the details, just wanted to get the proportions right. Spent maybe an hour just doodling different versions.
Next up, the clay. I’m using PMC3 silver clay. It’s pretty forgiving, but also kinda expensive, so I tried not to waste too much. I rolled out a slab, not too thin, maybe 3-4mm thick. Then, using my sketch as a guide, I started cutting out the main body shape. This was tricky ’cause it’s all curves and stuff. Had to recut it a few times to get it looking somewhat symmetrical.
After the body, I tackled the handles. Those little horse head things. I tried sculpting them freehand at first, but that was a disaster. Ended up using some silicone molds I had lying around from a previous project. They weren’t exactly horse heads, but close enough. I pressed the clay into the molds, popped ’em out, and cleaned ’em up with a needle tool. They looked alright, a little wonky, but alright.
Then came the fun part: attaching everything. I scored the clay where the handles would go and used some slip (basically just clay mixed with water) to glue them on. Made sure they were nice and secure. Let it all dry for a few hours, ’cause if you try to fire it when it’s still wet, it’ll crack.
While that was drying, I started working on the little horses for the top. Figured I couldn’t use molds for these, they needed to look a little more dynamic. These were tough. I mean, really tough. I must have spent like three hours just trying to get the horses to look like horses, not like weird blob monsters. They still kinda looked like blob monsters, but slightly more horselike.

Attached those little guys to the top of the urn after the handles were on and dry. Let that dry overnight. The next day was firing day! I used my little tabletop kiln. Followed the instructions for the PMC3 clay, which is basically heating it up to around 1600 degrees Fahrenheit for a couple of hours. The clay burns away, leaving just the pure silver behind.
Took it out of the kiln. It looked…okay. A little rough around the edges, literally. The horses were kinda lopsided, and one of the handles was a little wonky. But hey, it was silver! I then spent a good hour or so polishing it up with a rotary tool and some polishing compounds. Got it nice and shiny.
In the end, it wasn’t exactly the Preakness Stakes trophy, but it was close enough. It was a fun project, learned a lot about working with metal clay, and now I have a kinda-sorta trophy thing sitting on my desk. Maybe next time I’ll try making the Woodlawn Vase. Probably not, though. Those horses were a pain.