
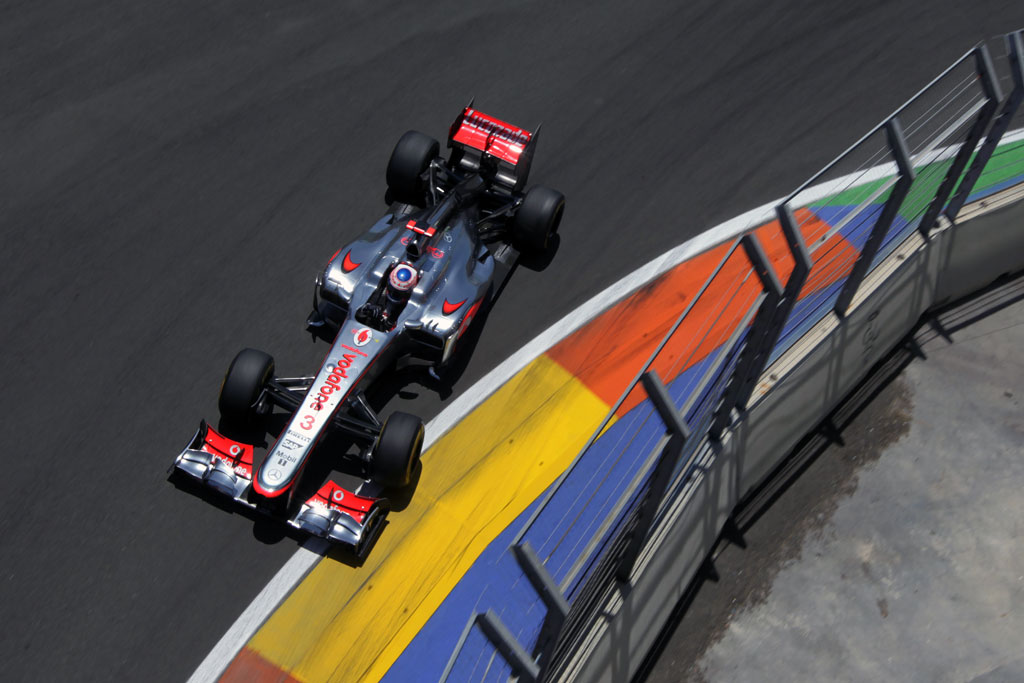
Alright, let’s talk about that 2012 McLaren F1 car project I got myself into. It wasn’t exactly planned, you know? Just sort of happened. I was digging through some old stuff, found some pictures from that F1 season, and that particular McLaren, the MP4-27, just caught my eye again. Maybe it was the silver and red, maybe just nostalgia. Anyway, I thought, “Hey, I should try and build that.”
Getting Started
So, the first thing I did was hunt down a model kit. Took a bit of searching, actually. Found one online, eventually. When it arrived, I cleared off my workspace – which really just means I pushed the piles of other half-finished projects to one side. Opened the box, looked at all those tiny plastic parts on the sprues. Seemed straightforward enough on the instruction sheet, but you know how that goes.
I started with the main chassis and the engine block. Pretty standard stuff. Snapping pieces together, a bit of glue here and there. Tried to be neat, but my fingers always seem too big for these tiny bits. Got the basic skeleton assembled over a couple of evenings. Felt pretty good, making progress.
The Fiddly Bits and Pieces
Then came the bodywork and the suspension. This is where things got a bit more tricky. Those complex aerodynamic parts around the sidepods and the floor… man, they needed careful handling.
- Getting the main body panels to line up perfectly was a pain. Lots of dry fitting, filing down tiny edges, testing again.
- The front wing assembly was delicate. Felt like I was performing surgery. One wrong move and snap! Luckily, I managed it without breaking anything major this time.
- Painting was another hurdle. Getting that specific chrome-silver look isn’t easy with hobby paints. Took a few tries to get something I was halfway happy with. Let it dry properly, which always tests my patience.
And the decals! Oh boy, the decals. Tiny little sponsor logos, stripes, numbers. They always look great on the sheet, but getting them onto the curved surfaces of the car without wrinkles or tearing? That took ages. Sliding them into place with tweezers, using decal softener… lots of holding my breath. There were definitely a few moments where I nearly threw the whole thing against the wall. Reminds me of trying to put up wallpaper once – thought it’d be simple, ended up a sticky mess. Same sort of frustration, just on a smaller scale.
Putting It All Together
After the painting and decals were finally done and sealed, it was time for the final assembly. Attaching the wheels, the wings, the little aerials. Seeing it actually start to look like the MP4-27 was pretty rewarding. It wasn’t perfect, mind you. If you look close, you’ll see flaws. A slightly wonky decal here, a paint smudge there. But honestly, that’s part of the process, isn’t it? It shows it was actually built by hand, not just popped out of a factory.
So yeah, it sits on my shelf now. Took longer than I thought, was more fiddly than I remembered model building being, but it was good fun overall. A nice little distraction. Seeing the finished thing there, imperfections and all, feels pretty satisfying. It’s done, it’s mine, and it reminds me of that whole process – the frustration and the small wins along the way.