Okay, so I’ve been tinkering around with this idea for a while, and today I finally made it happen. I’m talking about building a “parrilla de salida de f1” or, for those who don’t speak Spanish, an F1 starting grid. It sounds fancy, but trust me, it’s more straightforward than you might think. It was something that I felt like doing, and I did it. Let’s get to it!
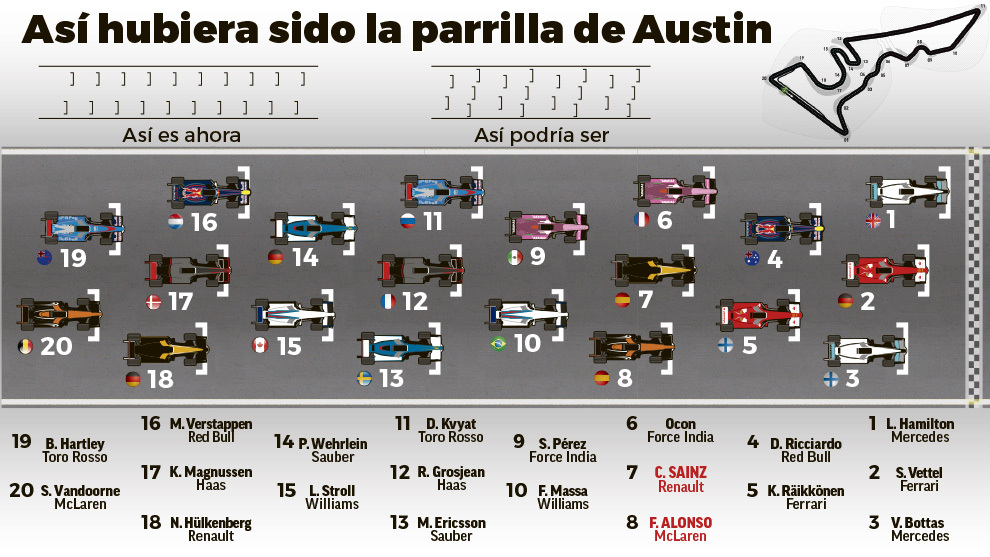
First off, I had to figure out what the heck an F1 starting grid actually is. It’s not that complicated, it turns out. The F1 starting grid is basically just the setup of cars before a race kicks off. You know, where they all line up in rows waiting for the lights to go out. So, I got that much down.
Then came the fun part – figuring out how this whole grid thing is determined. They use something called “Q3.” I found out that it was something about the fastest lap times during this Q3 thing decide who starts where. The guy with the fastest time gets to start in the very front, in what they call “pole position.” Makes sense, right? The fastest car gets the best spot.
With all this info in my head, I started sketching out what I wanted my grid to look like. I grabbed some cardboard, measured out some lines, and started cutting. I wanted to make sure each car had its own little spot, just like the real deal.
Next up, I needed some cars. You can’t have a starting grid without cars, duh. I raided my kid’s toy box and found a bunch of small toy cars, perfect for what I needed. They weren’t all fancy F1 cars, but hey, it’s the idea that counts, right?
Once I had the grid and the cars, it was just a matter of putting it all together. I placed each car in its designated spot, making sure they were all lined up nice and neat. I even added some extra details, like a start/finish line and some tiny flags. It was all coming together.
- Gather materials: Cardboard, ruler, scissors, toy cars.
- Sketch and cut: Draw out the grid on cardboard and cut it out.
- Arrange the cars: Place the toy cars on the grid, following the Q3 order.
- Add details: Draw a start/finish line and add any other decorations.
And there you have it, my very own F1 starting grid. It might not be as glamorous as the real thing, but it was a fun little project, and I’m pretty stoked with how it turned out. Plus, it was a good way to kill some time on a lazy Sunday afternoon. Maybe I’ll even try to build a mini-track next. Who knows? The sky’s the limit when you’re fueled by caffeine and a bit of boredom, right?