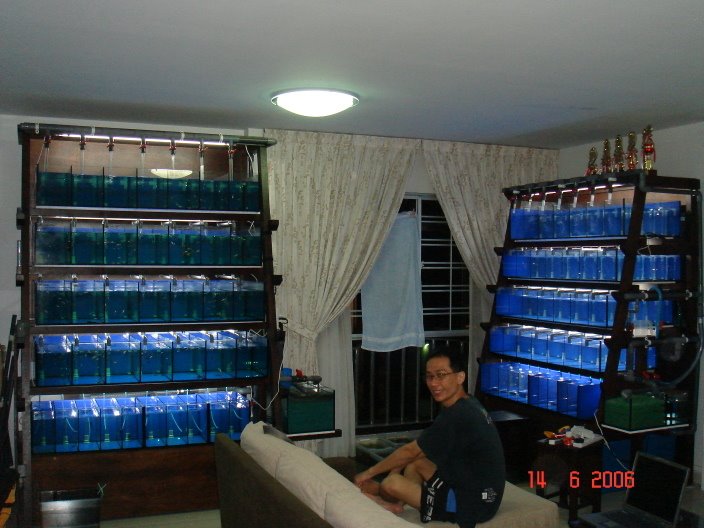
Seeing those fancy fish breeding setups made me think I’d need a fat wallet just to start. Forget that. I started digging into how pros do it cheap. Here’s exactly what I did.
Step 1: Staring Down the Cost Monster
First, I looked at ready-made kits online. Yikes! Prices made my eyes water. Big plastic tubs marketed as breeding tanks? Like fifty bucks for something that holds water? No way. Then came the filters, heaters, all that stuff adding up fast. I felt stuck before even starting. Figured there had to be a cheaper path.
Step 2: Hunting for Bargain Bin Gear
Hit up the usual suspects. Scoured local online garage sales. Kept it simple:
- Tank: Found a clean, leak-tested ten-gallon tank for literally five bucks. Way cheaper than a fancy tub.
- Heater: Snagged a small, adjustable one. Pre-owned but tested. Paid about the price of a cheap sandwich.
- Filter: Ditched complicated filters. Used a simple, gentle sponge filter driven by an air pump I already had. Cost? Just the sponge part, maybe three bucks.
- “Stuff”: Grabbed a handful of basic plastic plants from the bottom of someone’s fish gear box. Free. Found a scrap piece of smooth PVC pipe for hiding spots. Also free.
Basically became a second-hand scavenger hunt master.
Step 3: The “Good Enough” Setup Process
Got my haul home. Scrubbed everything down good with plain hot water, no soap. Rinsed like crazy.
Put the tank on a sturdy, level surface. Filled it slowly with dechlorinated tap water (used that cheap liquid stuff that treats gallons). Set up the heater in a corner, plugged it in, and waited for the water to slowly warm up. Added the sponge filter and started bubbling.
Dropped in the plants and PVC pipe. Looked kinda ugly but clean and functional. Total time? Maybe an hour, mostly waiting for the temperature.
Step 4: Fish Time (The Waiting Game)
Didn’t rush this. Let the filter bubble away for a week, adding a tiny pinch of fish food every other day to start getting that good bacteria going. Patience! Tested the water with those cheap test strips. Once things looked stable, added a small group of my chosen beginner-friendly breeders.
Big tip: Kept their main tank feeding routine. Nothing fancy. Just regular, decent-quality flakes.
Monitored them close. Saw the behaviors, knew eggs were coming soon. Placed some simple, cheap yarn mops in the tank for the eggs. Those things cost pennies.
Step 5: Reality Check & Success!
Sure, it’s not a show tank. It lacks the bells and whistles. But guess what? It works. Eggs showed up on the yarn. Saw tiny fry swimming. My total setup cost? Honestly, under twenty bucks for everything water-touching, most of it used. Proof you absolutely don’t need top-shelf stuff right away. It’s about understanding what the fish actually need, not what the ads say you gotta buy.